
Yes, ginger root will grow for most U.S. home gardeners, but whether it thrives outdoors in the ground, needs container treatment, or requires a heated tunnel depends almost entirely on where you live and how long your frost-free window is. In USDA zones 8 and warmer, ginger can stay in the ground year-round with minimal fuss. In zones 5 through 7, it grows fine as a seasonal crop with a container or tunnel setup. In the coldest zones (3 and 4), it's still doable indoors, but the payoff is modest unless you have a greenhouse or heated space.
Will Ginger Root Grow? Zone-Based Guide for Home Gardeners
Marcus Petersen
22 Jul 2026
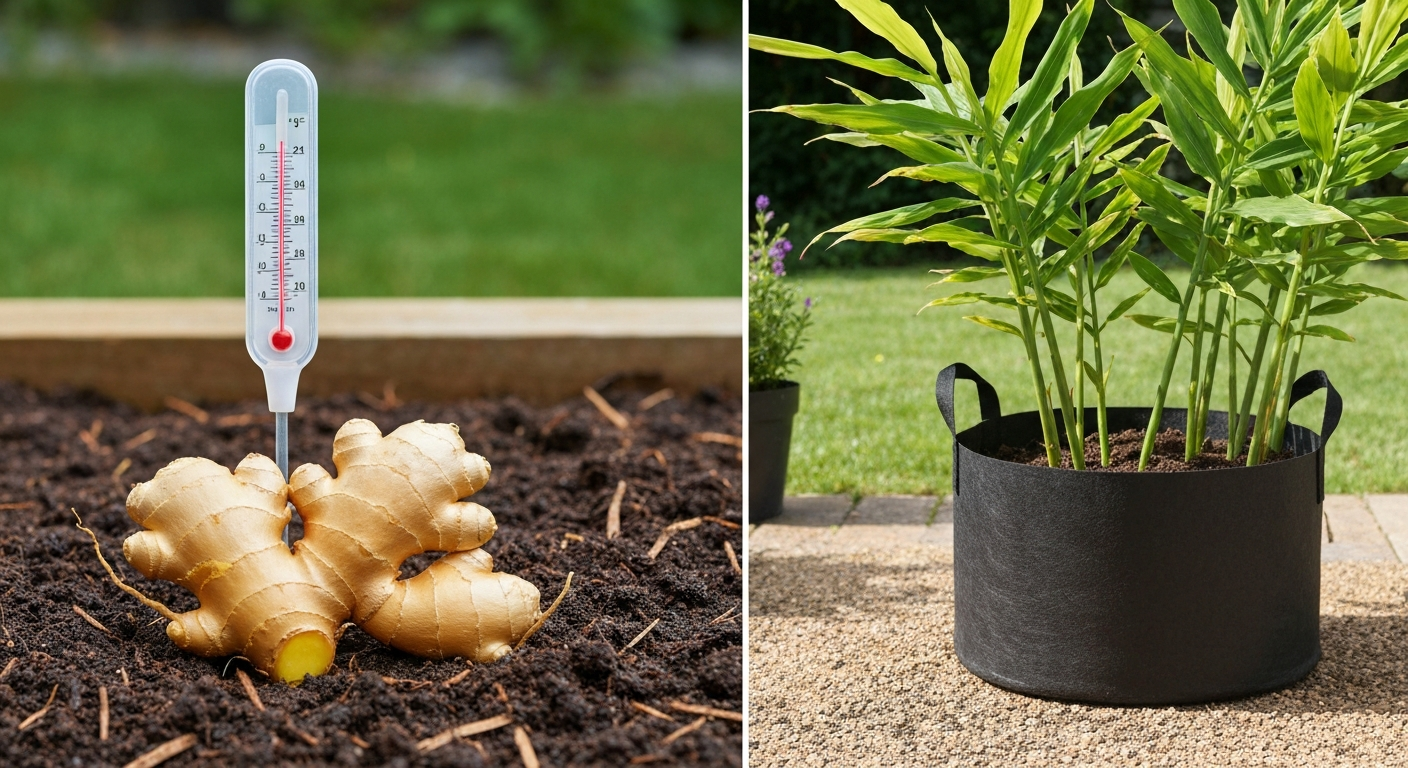
Quick verdict: will ginger root grow where you live?
The honest zone-by-zone answer matters more than any general "yes ginger grows easily" claim you'll read elsewhere. Ginger (Zingiber officinale) is a tropical perennial that needs 8 to 10 frost-free months to produce full-size mature rhizomes, or at least 5 to 7 months for baby ginger. Your USDA zone tells you whether you have that window, and the 2023 USDA Plant Hardiness Zone Map is the right starting point.
| USDA Zone | Frost-free window | Outdoor verdict | What to expect |
|---|---|---|---|
| 9b–13 (FL, Gulf Coast, Hawaii, S. CA) | 10–12 months | Plant in-ground, perennial | Mature rhizomes in 8–10 months; can leave in ground |
| 8a–9a (Pacific NW coast, mid-TX, SE states) | 8–10 months | In-ground seasonal or perennial with mulch | Mature rhizomes most years; mulch heavily for winter |
| 7a–7b (Mid-Atlantic, Piedmont, W. OR/WA) | 6–8 months | Container or tunnel strongly recommended | Baby ginger reliable; mature ginger borderline |
| 5a–6b (Midwest, mid-Atlantic, lower NE) | 4–6 months | Container or high tunnel required | Baby ginger with pre-sprouting; bring in before frost |
| 3a–4b (Northern states, upper NE) | 3–4 months | Indoor/greenhouse only | Baby ginger possible; mature harvest very unlikely outdoors |
A quick note on two climates that come up often in this community: New England gardeners in zones 5 and 6 can absolutely grow ginger, but it means pre-sprouting on a heat mat in late winter, planting under cover when soil hits 65°F, and harvesting baby ginger before the first fall frost. University of New Hampshire trials showed this approach produces usable yields from late September through November. It takes planning, but it works. At the other extreme, tropical West Africa, including places like Southwest Nigeria, sits in a climate where ginger is an established smallholder crop, with warm temperatures and high humidity matching ginger's native range almost perfectly. There, the limiting factor isn't cold, it's soil drainage and disease pressure during wet seasons.
Deciding whether to grow ginger: climate, microclimate, and indoor alternatives
Before buying seed ginger, be realistic about your site. Ginger wants air temperatures consistently between roughly 65°F and 86°F (19–30°C) with relative humidity around 70 to 90 percent and no frost at soil level. That's a narrow band, and checking your USDA zone is only part of the picture. A south-facing wall in zone 6b might give you a microclimate warm enough to push ginger a few extra weeks. A cold valley in zone 8a that pools frost might kill it. I've seen gardeners in coastal zone 7 pull off full-season ginger by planting against a brick foundation, and I've watched people in zone 9 lose entire plantings because they put ginger in a low spot that flooded.
If your outdoor window is genuinely too short, container growing and indoor starts aren't a compromise; they're often the smarter path. A pot on a sunny south-facing windowsill in February, moved to a shaded patio by June and brought back inside in September, can produce real ginger in zone 5. It takes more management, but it doesn't require a greenhouse. If you're renting or have limited outdoor space, ginger is one of the better candidates for a large indoor container because it actually prefers filtered light over direct sun.
Choosing and preparing rhizomes: picking healthy seed ginger and checking viability
You have two real options for starting material: certified seed ginger from a farm or extension supplier, or grocery store ginger. Certified seed ginger from Hawaii or a reputable U.S. grower is cleaner and lower risk for disease. Grocery ginger is widely available, cheap, and works, but it sometimes comes from farms with disease pressure and it may have been treated with a growth inhibitor. If you're buying from a grocery store, choose organic when possible, since conventional ginger is more likely to have been sprout-inhibited.
Whatever the source, look for plump, firm rhizomes with obvious growth buds (called "eyes," similar to potato eyes) that are just starting to swell or show a slight green tinge. Shriveled, soft, or moldy pieces are not worth planting. UF/IFAS extension guidance is clear that starting with clean, disease-free material is one of the most important decisions you'll make, because soilborne pathogens like Pythium, Phytophthora, Fusarium, and Ralstonia solanacearum are already documented in U.S. ginger production and can wipe out a planting before it even gets going. One infected piece can contaminate a whole container.
- Choose firm, plump rhizomes with visible, swelling buds
- Avoid pieces that are soft, shriveled, moldy, or show any rot at cut surfaces
- Prefer organic grocery ginger if certified seed ginger is unavailable
- Look for pieces at least 1 to 2 inches long with two or more buds
- Reject any piece with a foul smell, discolored flesh (should be pale yellow to cream), or wet spots
Pre-sprouting and cutting rhizomes: step-by-step prep for forcing grocery ginger
Pre-sprouting is the single best thing you can do if you're in a short-season climate. Instead of planting a dormant rhizome directly in cool spring soil and waiting, you wake it up indoors weeks before conditions are right outside. I killed three batches early on by skipping this step and planting cold-dormant grocery ginger straight into 60°F soil in April. They just sat there, rotted, and never sprouted.
- Start 6 to 8 weeks before your intended outdoor planting date (or in late January to February for most northern gardeners).
- If your rhizome piece is larger than about 2 to 3 inches, cut it into sections, each with at least two buds. A clean sharp knife is fine.
- Dust cut surfaces lightly with sulfur powder or dip briefly in a diluted hydrogen peroxide solution (around 3 percent). This reduces rot risk at the cut face.
- Set cut pieces in a warm, dry spot for 1 to 2 days to let the cut surfaces callus over. Do not skip this step.
- Place callused pieces buds-up on top of barely moist potting mix in a tray or shallow container. Do not bury them yet.
- Keep the tray at around 75 to 85°F (24–29°C). A seedling heat mat set to 80°F works perfectly. Cover loosely with a plastic dome or bag to maintain humidity.
- Check every few days. Sprouts should appear within 2 to 6 weeks. Avoid temperatures above 86°F and keep the mix barely moist, not wet, to prevent rot.
- Once sprouts are 0.5 to 1 inch long, the pieces are ready to pot up or transplant.
Research from UNH confirms that pre-sprouting on heat mats at 75 to 85°F significantly shortens the time to establishment after transplanting and meaningfully improves yields in short-season settings. The controlled-temperature sprouting research also shows ginger has a clear optimum around 77 to 79°F (25–26°C) for early rhizome growth, so a heat mat in that range is genuinely useful, not just convenience.
Planting timing and layout: when to plant, depth, spacing, and timing by zone
The fundamental rule is this: do not put ginger in the ground or move containers outdoors until nighttime temperatures are reliably above 50°F (10°C) and soil temperature at the planting depth is at least 65°F. Below 50°F at night, growth stalls and the plants sulk. Below about 35 to 40°F, the rhizomes risk chilling injury and may fail to sprout even if they were perfectly healthy going in. NOAA's frost-date climatologies (based on 1991–2020 normals) are a useful reference for finding your reliable last frost date and tracking when soil warms up. NOAA Climate.gov hosts an interactive map of the average date of last spring freeze and first fall freeze across the United States based on 1991–2020 normals Interactive map: average date of last spring freeze across the United States — NOAA Climate.gov.
| Region / Zone | Start pre-sprouting indoors | Move outside or to tunnel | Harvest window |
|---|---|---|---|
| Zones 9b–13 (Deep South, Hawaii) | Not required; plant direct late Feb–Mar | February–March | Oct–Jan (mature) or Aug–Sep (baby) |
| Zones 8a–9a (SE states, mid-TX, coastal CA) | January–February | March–April after last frost | Sept–Nov (mature) or Aug (baby) |
| Zones 7a–7b (Mid-Atlantic, Piedmont) | Late January–February | April–May, soil >65°F | Sept–Oct (baby ginger) |
| Zones 5–6 (Midwest, lower NE) | Late January–early February | May, under cover or tunnel | Late Sept–Oct (baby ginger before frost) |
| Zones 3–4 (Northern states, upper NE) | January | June, container only or greenhouse | Sept (baby ginger, indoor finish) |
For planting depth and spacing, UF/IFAS extension research is specific: plant rhizome pieces about 2 inches deep with buds pointing up. The Missouri Botanical Garden's Zingiber officinale, Missouri Botanical Garden Plant Finder recommends planting fresh rhizome pieces about 1–2 inches deep after letting cut pieces callus for 1–2 days, and bringing plants inside before night temperatures drop below roughly 50°F (10°C) Zingiber officinale — Missouri Botanical Garden Plant Finder. In-ground spacing is roughly 18 inches between plants in rows. For containers, 1 rhizome piece per 5-gallon pot is a workable ratio, or 3 pieces in a 15-gallon container. Give them some horizontal room because the rhizomes spread laterally as they grow. Crowding reduces yield and makes harvest harder.
Soil mix and amendments: ideal soils, making a potting blend, and improving sandy soils
Ginger wants soil that drains freely but retains enough moisture and organic matter to stay consistently moist between waterings. The worst thing you can do is put it in heavy clay that sits wet after rain, or pure sand that dries out within an hour. Both create problems, but they're fixable.
For in-ground planting, aim for a well-amended loamy bed with plenty of finished compost worked in. A rough target is soil that holds its shape when squeezed but crumbles easily when poked. Raised beds work very well because you control the mix entirely. For container growing, a quality potting mix with added perlite (about 20 to 25 percent by volume) gives good drainage without drying too fast. Avoid straight garden soil in containers; it compacts and kills drainage.
Sandy soils are a specific challenge. They drain so fast that ginger, which needs consistent moisture during its active growing phase, can suffer from drought stress even with frequent watering. If you're growing in a sandy region (common in coastal Southeast, parts of the Southwest, and relevant to tropical climates like Southwest Nigeria), work in large amounts of compost, aged manure, or coco coir to increase water-holding capacity. Mulching heavily over sandy soil also makes a real difference, slowing evaporation and moderating soil temperature. A 2 to 3 inch layer of straw, shredded leaves, or wood chips directly over the planting area is worth doing regardless of soil type, but especially in sandy conditions. If you're wondering whether you can grow ginger in sand, read our guide on can you grow ginger in sand for tips on amending sandy soils and keeping moisture consistent.
- Target pH: 5.5 to 6.5 (slightly acidic)
- Organic matter: 20–30% compost by volume for in-ground beds
- For containers: quality potting mix plus 20–25% perlite
- For sandy soils: add coco coir or compost at 30–40% by volume and mulch the surface
- Avoid heavy clay and compacted subsoil; raised beds solve both problems
- Do not use unsterilized native soil in containers; pathogen risk is too high
Watering, light, and temperature: what ginger actually needs day to day
Ginger's water needs are substantial once it's actively growing. In warm summer conditions, it can use a meaningful amount of water every day. UF/IFAS guidance for Florida summer production suggests irrigation or equivalent rainfall is often needed daily during the peak growing season. The catch is that ginger is simultaneously highly sensitive to waterlogging. You're aiming for consistently moist but never saturated. That's why drainage is non-negotiable: a well-draining soil makes hitting that target much easier.
One useful trick: stop watering about a month before you plan to harvest. Dry-down helps the rhizomes firm up, makes them easier to clean, and slightly extends storage life. In practice for northern gardeners, this means tapering off irrigation in late August or September as you prepare for the fall harvest.
For light, ginger is not a full-sun crop. In its native tropical habitat it grows under a forest canopy. Filtered light or dappled shade, roughly 3 to 5 hours of direct sun per day, is ideal. In zones 8 and warmer, afternoon shade is especially helpful during the hottest part of summer. Indoors, a bright east or south-facing window without direct midday sun is a reasonable substitute. Grow lights at moderate intensity work well for indoor container growing.
Temperature is the most important factor of all. Daytime temperatures between 65°F and 85°F (about 19 to 29°C) are the sweet spot for active growth and rhizome development. Above 90°F the plants begin to stress, especially without shade. Below 50°F at night, growth slows to nearly nothing. The rhizomes are genuinely chilling-sensitive: research has documented sprouting failure and tissue damage when storage or soil temperatures drop into the 35 to 45°F (roughly 2 to 8°C) range. This isn't a frost-tolerant herb that can tough out a light freeze. Even the roots in the soil are vulnerable.
Container growing and indoor methods: what cold-climate and urban gardeners need to know
Container growing is the realistic path for gardeners in zones 6 and colder, for New England growers who want a reliable annual harvest, and for anyone without a suitable in-ground bed. The good news is that ginger actually does well in containers and the setup is straightforward.
Pot size matters. Go with at least a 5-gallon container per rhizome piece, or a single 15-gallon container for three pieces. Smaller pots restrict rhizome spread and reduce yield. Wide, shallow containers (like a 15-gallon fabric pot or a large nursery flat) work better than tall, narrow pots because ginger spreads horizontally. Drainage holes are mandatory; standing water in the saucer will cause rot within days in summer heat.
For overwintering in cold regions, the approach is simple: when nighttime temperatures drop toward 50°F in early fall, bring the container inside before any frost. You have a choice at this point. You can continue growing the plant indoors under lights or in a sunny window through fall and into winter for a later harvest. Or you can let the plant die back naturally, reduce watering to almost nothing, and store the dormant pot in a cool but frost-free location (a basement at 50 to 60°F is ideal) until spring. Do not store dormant rhizomes below 50°F for extended periods; chilling injury is a real risk. In spring, bring the pot back to warmth and resume watering to wake the rhizomes.
For New England gardeners specifically, the UNH Cooperative Extension high-tunnel model is proven: pre-sprout on heat mats in late January or February, transplant to a high tunnel when soil temperatures exceed 65°F (typically May in southern NH, June further north), and harvest baby ginger from late September through early November. Baby ginger at this stage is tender, mild-flavored, and valuable. Mature rhizomes with full papery skin require 8 to 12 months of growth, which is simply not possible outdoors in New England without a year-round heated structure.
Urban gardeners and renters with only a balcony or patio can still grow ginger in a large fabric pot or a standard 15-gallon nursery pot. Keep it in a spot that gets morning sun and afternoon shade, water more frequently than you would an in-ground plant (containers dry out faster), and bring it inside at the end of summer. A single 15-gallon pot can yield a meaningful harvest of baby ginger, easily enough to flavor a season's worth of cooking. It's a genuinely practical crop for small-space growing, which is more than you can say for most specialty spices.
Pests, diseases, and common failure points
The most common failure for new growers isn't pests; it's rot from either poor drainage or planting before the soil is warm enough. A rhizome sitting in cool, wet soil is almost guaranteed to rot before it sprouts. If you pre-sprout indoors and wait for genuinely warm soil, you eliminate the single biggest cause of early failure.
Once plants are established and growing, the main disease threats are soilborne pathogens: Pythium and Phytophthora cause rhizome and root rots, Fusarium oxysporum causes a yellowing wilt, and Ralstonia solanacearum (bacterial wilt) is a serious problem in warmer regions. These are all documented in U.S. ginger production. The practical prevention is straightforward: start with clean planting material, use fresh or sterilized potting mix for containers, never reuse soil from a previous diseased planting, and avoid overwatering. There is no easy cure once a soilborne pathogen is established; removal and disposal of affected plants is usually the only option.
Root-knot nematodes are also a documented problem, especially in sandy soils in warm climates. If you're in a region where nematodes are known to be present (parts of Florida, the Gulf Coast, and tropical regions), using containers with fresh sterile mix is a major advantage over in-ground planting.
On the insect side, aphids and spider mites sometimes attack indoor or container-grown ginger, especially in dry indoor winter conditions. A strong spray of water or insecticidal soap handles both. Rhizome flies and shoot borers are more of a concern in tropical production regions. In cooler U.S. climates they're rarely a major issue for home gardeners.
Harvest, storage, and realistic yield expectations
Baby ginger (harvested before the rhizomes fully mature) is ready after about 5 to 8 months of growth. It has thin, almost transparent skin, a mild flavor, and no need to peel. Mature ginger with the familiar papery skin takes 8 to 12 months. For most northern U.S. gardeners, baby ginger is the practical target. For zone 8 and warmer, mature ginger is achievable most years.
To harvest, dig or tip out the pot and pull the rhizomes. Shake off soil and rinse gently. Cure freshly harvested mature ginger in a warm, shaded spot for a few days to toughen the skin before storage. Baby ginger doesn't need curing. Fresh ginger stores for 2 to 3 weeks in the refrigerator (wrapped loosely, not in a sealed bag) or up to 6 months in the freezer. Dried or preserved ginger lasts much longer.
Yield from a home planting is modest. A single 15-gallon container with three rhizome pieces will typically yield somewhere between 1 and 2 pounds of baby ginger or slightly more mature ginger if the season is long enough. An in-ground row in zone 9 can do considerably better, but this isn't a crop you'll be selling by the bushel. For home cooking, even a small harvest is meaningful because fresh ginger is expensive and the homegrown product is noticeably better in flavor. If that's your benchmark, ginger is well worth the effort in nearly any zone with a reasonable growing season.
Worth growing? The honest summary
Ginger root will grow for you if you match your approach to your climate. In zones 8 and warmer, just plant it and give it moisture and shade. In zones 5 through 7, pre-sprout indoors, grow under cover, harvest baby ginger, and bring containers in before frost. In zones 3 and 4, it's an indoor or greenhouse project with limited yield. Wherever you are, start with clean planting material, never plant in cold or waterlogged soil, and give the plants enough horizontal space in a container or bed. The main failure modes (cold soil, wet soil, and diseased rhizomes) are all preventable. If you've avoided those, the plant is genuinely easy to grow and rewarding in proportion to your season length. For a different topic of interest, see the write-up on whether ancient seeds can grow on Ginger Island can ancient seeds grow on Ginger Island.
FAQ
Will ginger root grow where I live — quick yes/no by climate (USDA zone guidance)?
Yes in warm, frost-free climates (USDA zones ~9–12) with minimal protection; maybe with protection in mild-winter zones (zones 7–8); usually not reliably as an outdoor perennial in cold-winter zones (zones 3–6). Summary: - Zones 9–12: Yes outdoors year-round in suitable sites. - Zones 7–8: Yes if planted after last frost and lifted/overwintered or grown in containers and moved indoors. - Zones 3–6: Not as an overwintering outdoor perennial; grow in containers/greenhouse or as an annual (plant each spring and harvest before frost). Use your local USDA hardiness zone and local frost‑date data to plan timing.
Can I grow ginger from grocery store rhizomes (store‑bought ginger)?
Yes. Most grocery ginger is viable and will sprout if it’s fresh (firm, plump, with visible 'eyes' or buds). Avoid shriveled or dried pieces. For better disease control, consider buying certified seed rhizomes if available, but grocery rhizomes are suitable for home gardeners.
How do I pick and prepare rhizomes (including grocery ginger) for planting?
Choose firm, plump rhizomes with visible buds. Steps: 1) Cut large rhizomes into 2–3 inch pieces with at least 1–2 buds each. 2) Optionally disinfect cuts (quick dip in weak bleach ~50 ppm or hydrogen peroxide) to reduce pathogens. 3) Let cut pieces callus/dry for 24–72 hours in a warm, dry, shaded spot to reduce rot. 4) Label and store briefly in a cool, not cold, place if not planting immediately (avoid refrigeration). Pre‑sprouting (below) is recommended in cool climates.
What is pre‑sprouting and how do I do it (why and when)?
Pre‑sprouting (chitting) encourages faster, more uniform shoots and lengthens the season in cool regions. Method: place callused rhizome pieces on or slightly buried in a moist, sterile potting mix or vermiculite at warm temperatures ~75–85°F (24–29°C), keep humid but not waterlogged and in bright, indirect light. Expect shoots in 2–8 weeks. Plant out after sprouts are ~1–2 inches and soil/outdoor temperatures are safe (night temps consistently >50°F/10°C).
When and how deep/spacing to plant ginger outdoors or in garden beds?
Timing: plant after all danger of frost and when soil temperature is at least ~60–65°F (15–18°C); in warm climates plant anytime. Depth: plant rhizome pieces 1–2 inches (2–5 cm) below the soil surface with buds pointing up. Spacing: allow about 12–18 inches (30–45 cm) between plants (≈1.5 ft row spacing for beds). Mulch to conserve moisture and moderate soil temperature.
What soil mix, light, temperature, and watering conditions does ginger need?
Soil: rich, loose, well‑draining loam amended with compost; pH 5.5–6.5 typical. For containers use a high‑quality potting mix amended with compost and perlite for drainage. Light: bright, filtered light or partial shade (morning sun, afternoon shade). Temperature: ideal air/soil ~68–86°F (20–30°C); growth slows below ~60°F (15°C) and chilling injury occurs near freezing to ~40°F (4–10°C). Watering: keep evenly moist (not waterlogged). Frequent irrigation is needed in warm seasons; avoid standing water and allow top inch to dry slightly to reduce rot risk.
Next Articles
Can You Grow Black Pepper in the US Where and How
Learn where black pepper can be grown in the US and how to grow it indoors or in warm zones for fruit.

Can You Grow Capers in the US? Regional Guide for Home Gardeners
Regional guide to growing caper plants in the US, choosing cultivars, meeting soil and climate needs, and harvesting bud
Can You Grow Peppercorns in the US? A Zone-by-Zone Guide
Zone-by-zone guide to growing black pepper peppercorns in the US, including heat, humidity, indoor options, and timeline